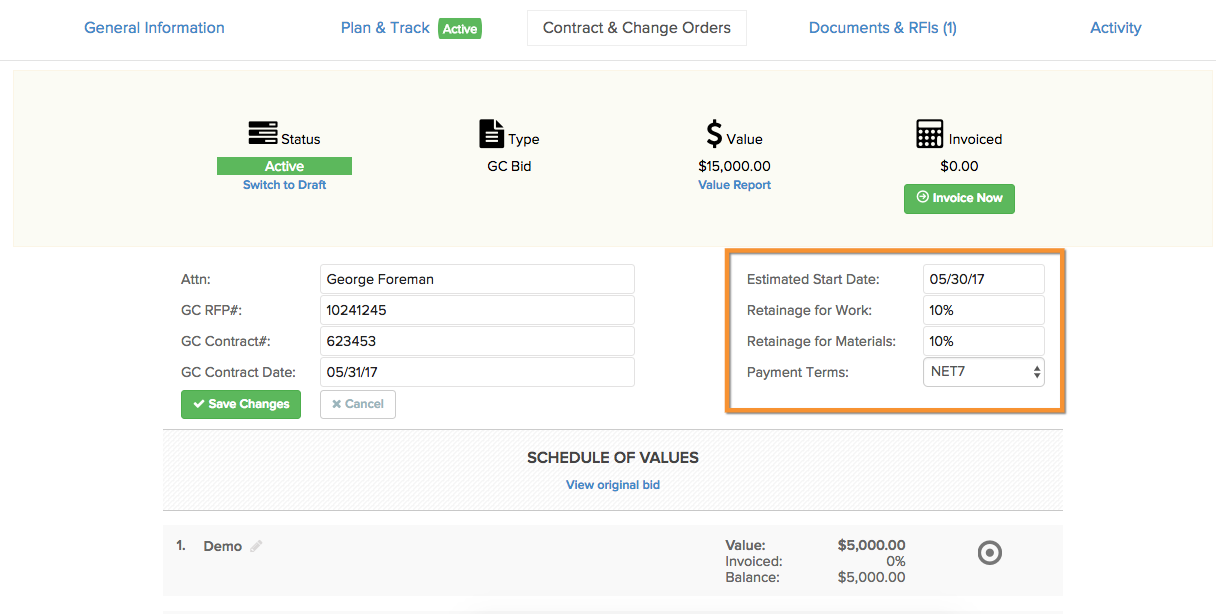
To begin, we will have created our contract normally, with this example reflecting 10% retainage:
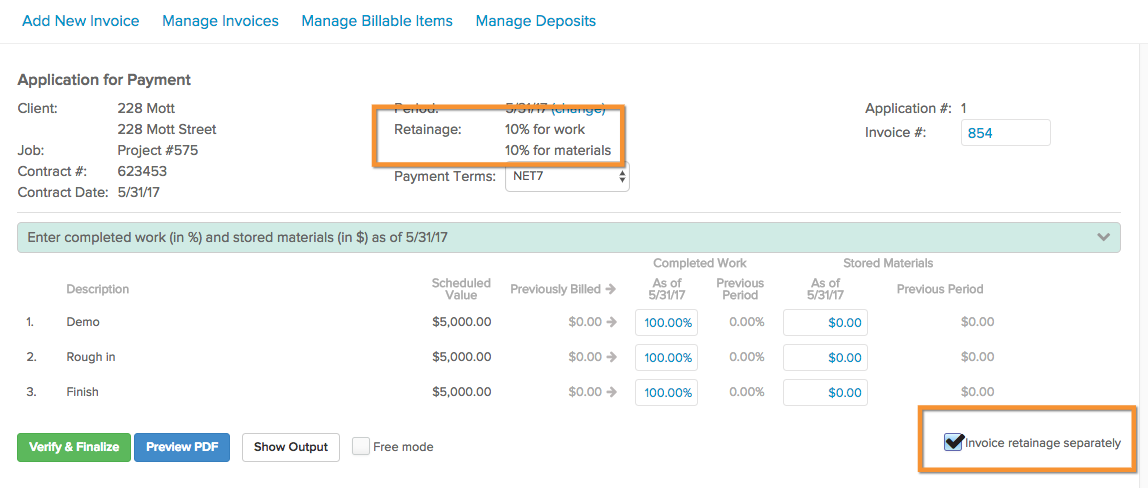
When creating the invoice, make sure the retainage is invoiced separately:
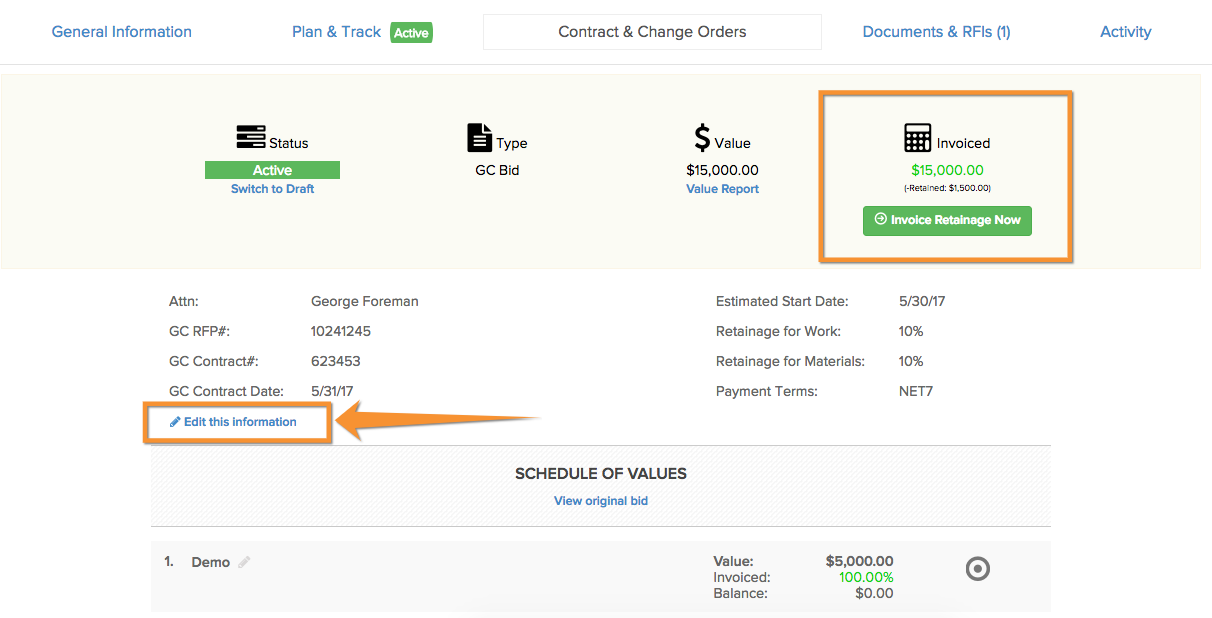
Once the invoice has been verified and finalized, we can invoice the retainage on its own. To do this, located above the Schedule of Values, click the blue link to edit the information of the contract:
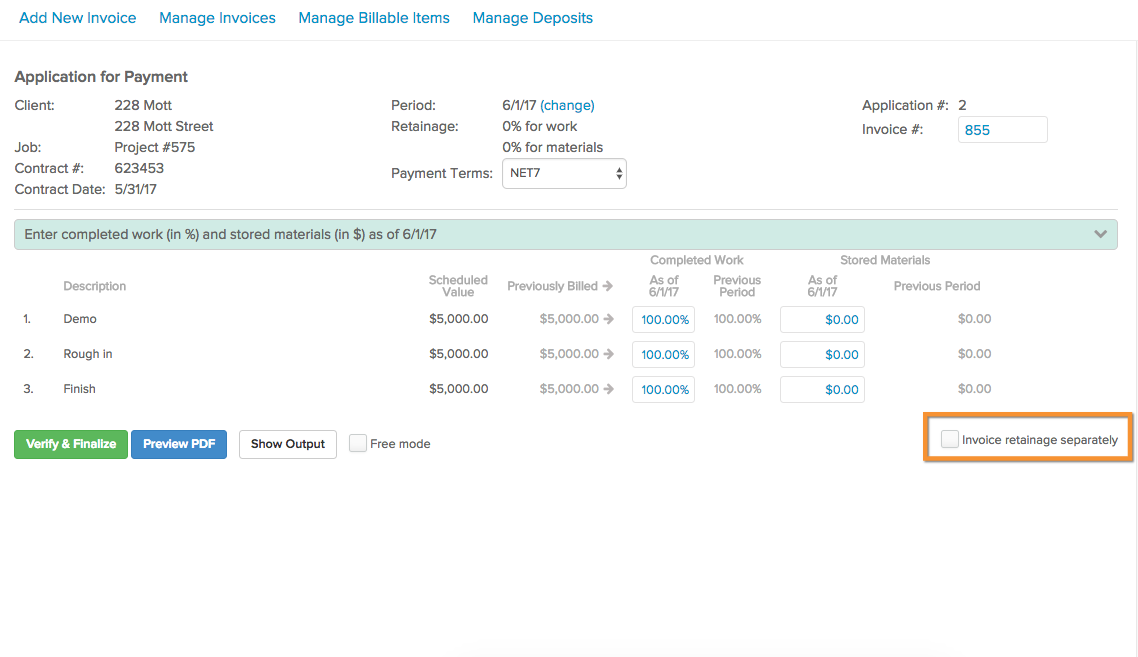
When editing, change the retainage value to 0%. Make sure to save the new information before proceeding. When the information looks like below, invoice the retainage once more:

Now that the retainage value has been reset to 0%, the amount that was previously retained is now moved back into the AIA invoice. Since everything aside from the original retainage has been invoiced, this value is all that is left. Make sure Invoice Retainage Separately is unchecked. You are able to preview the document as a PDF, found in blue at the bottom left side:
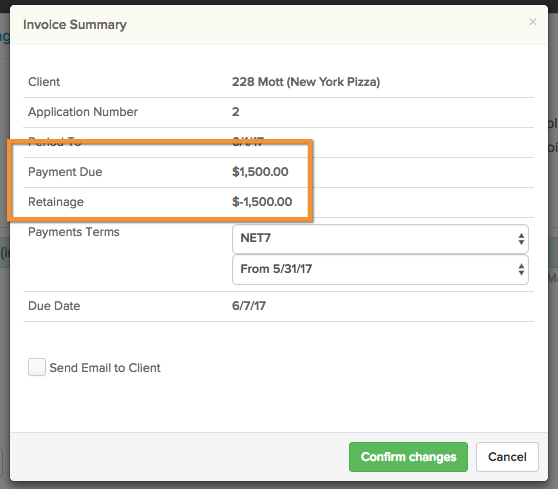
When verifying the invoice, you can see the Payment Due is being taken from the Retainage amount. Just as before, you are able to email the invoice to the client:
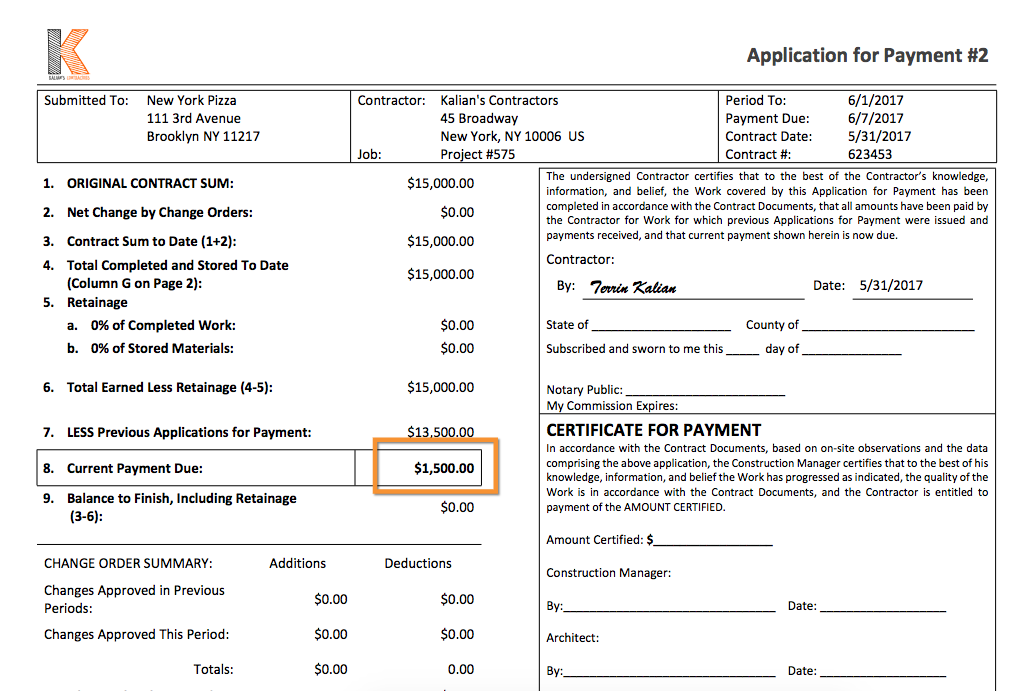
Finally, when previewing and downloading the document, you will see the pay app and continuation sheets. As highlighted below, the current payment due is the amount originally retained:

Comments
0 comments
Please sign in to leave a comment.