
Zapier lets you connect Knowify to 1,000+ other web services. Automated connections called Zaps, set up in minutes with no coding, can automate your day-to-day tasks and build workflows between apps that otherwise wouldn't be possible.
Each Zap has one app as the Trigger, where your information comes from and which causes one or more Actions in other apps, where your data gets sent automatically.
Pre-requirement
You will need a Growth or Enterprise Knowify account to enable generate an API Key for Zapier. Reach out to support@knowify.com if you need information about this or wish to upgrade your account.
To get your API Key, follow these steps:
1. Log into your Knowify account with a user with Admin privileges.
2. Click the "User" icon on the top right corner and go to the Admin section.
3. Choose "Customize".
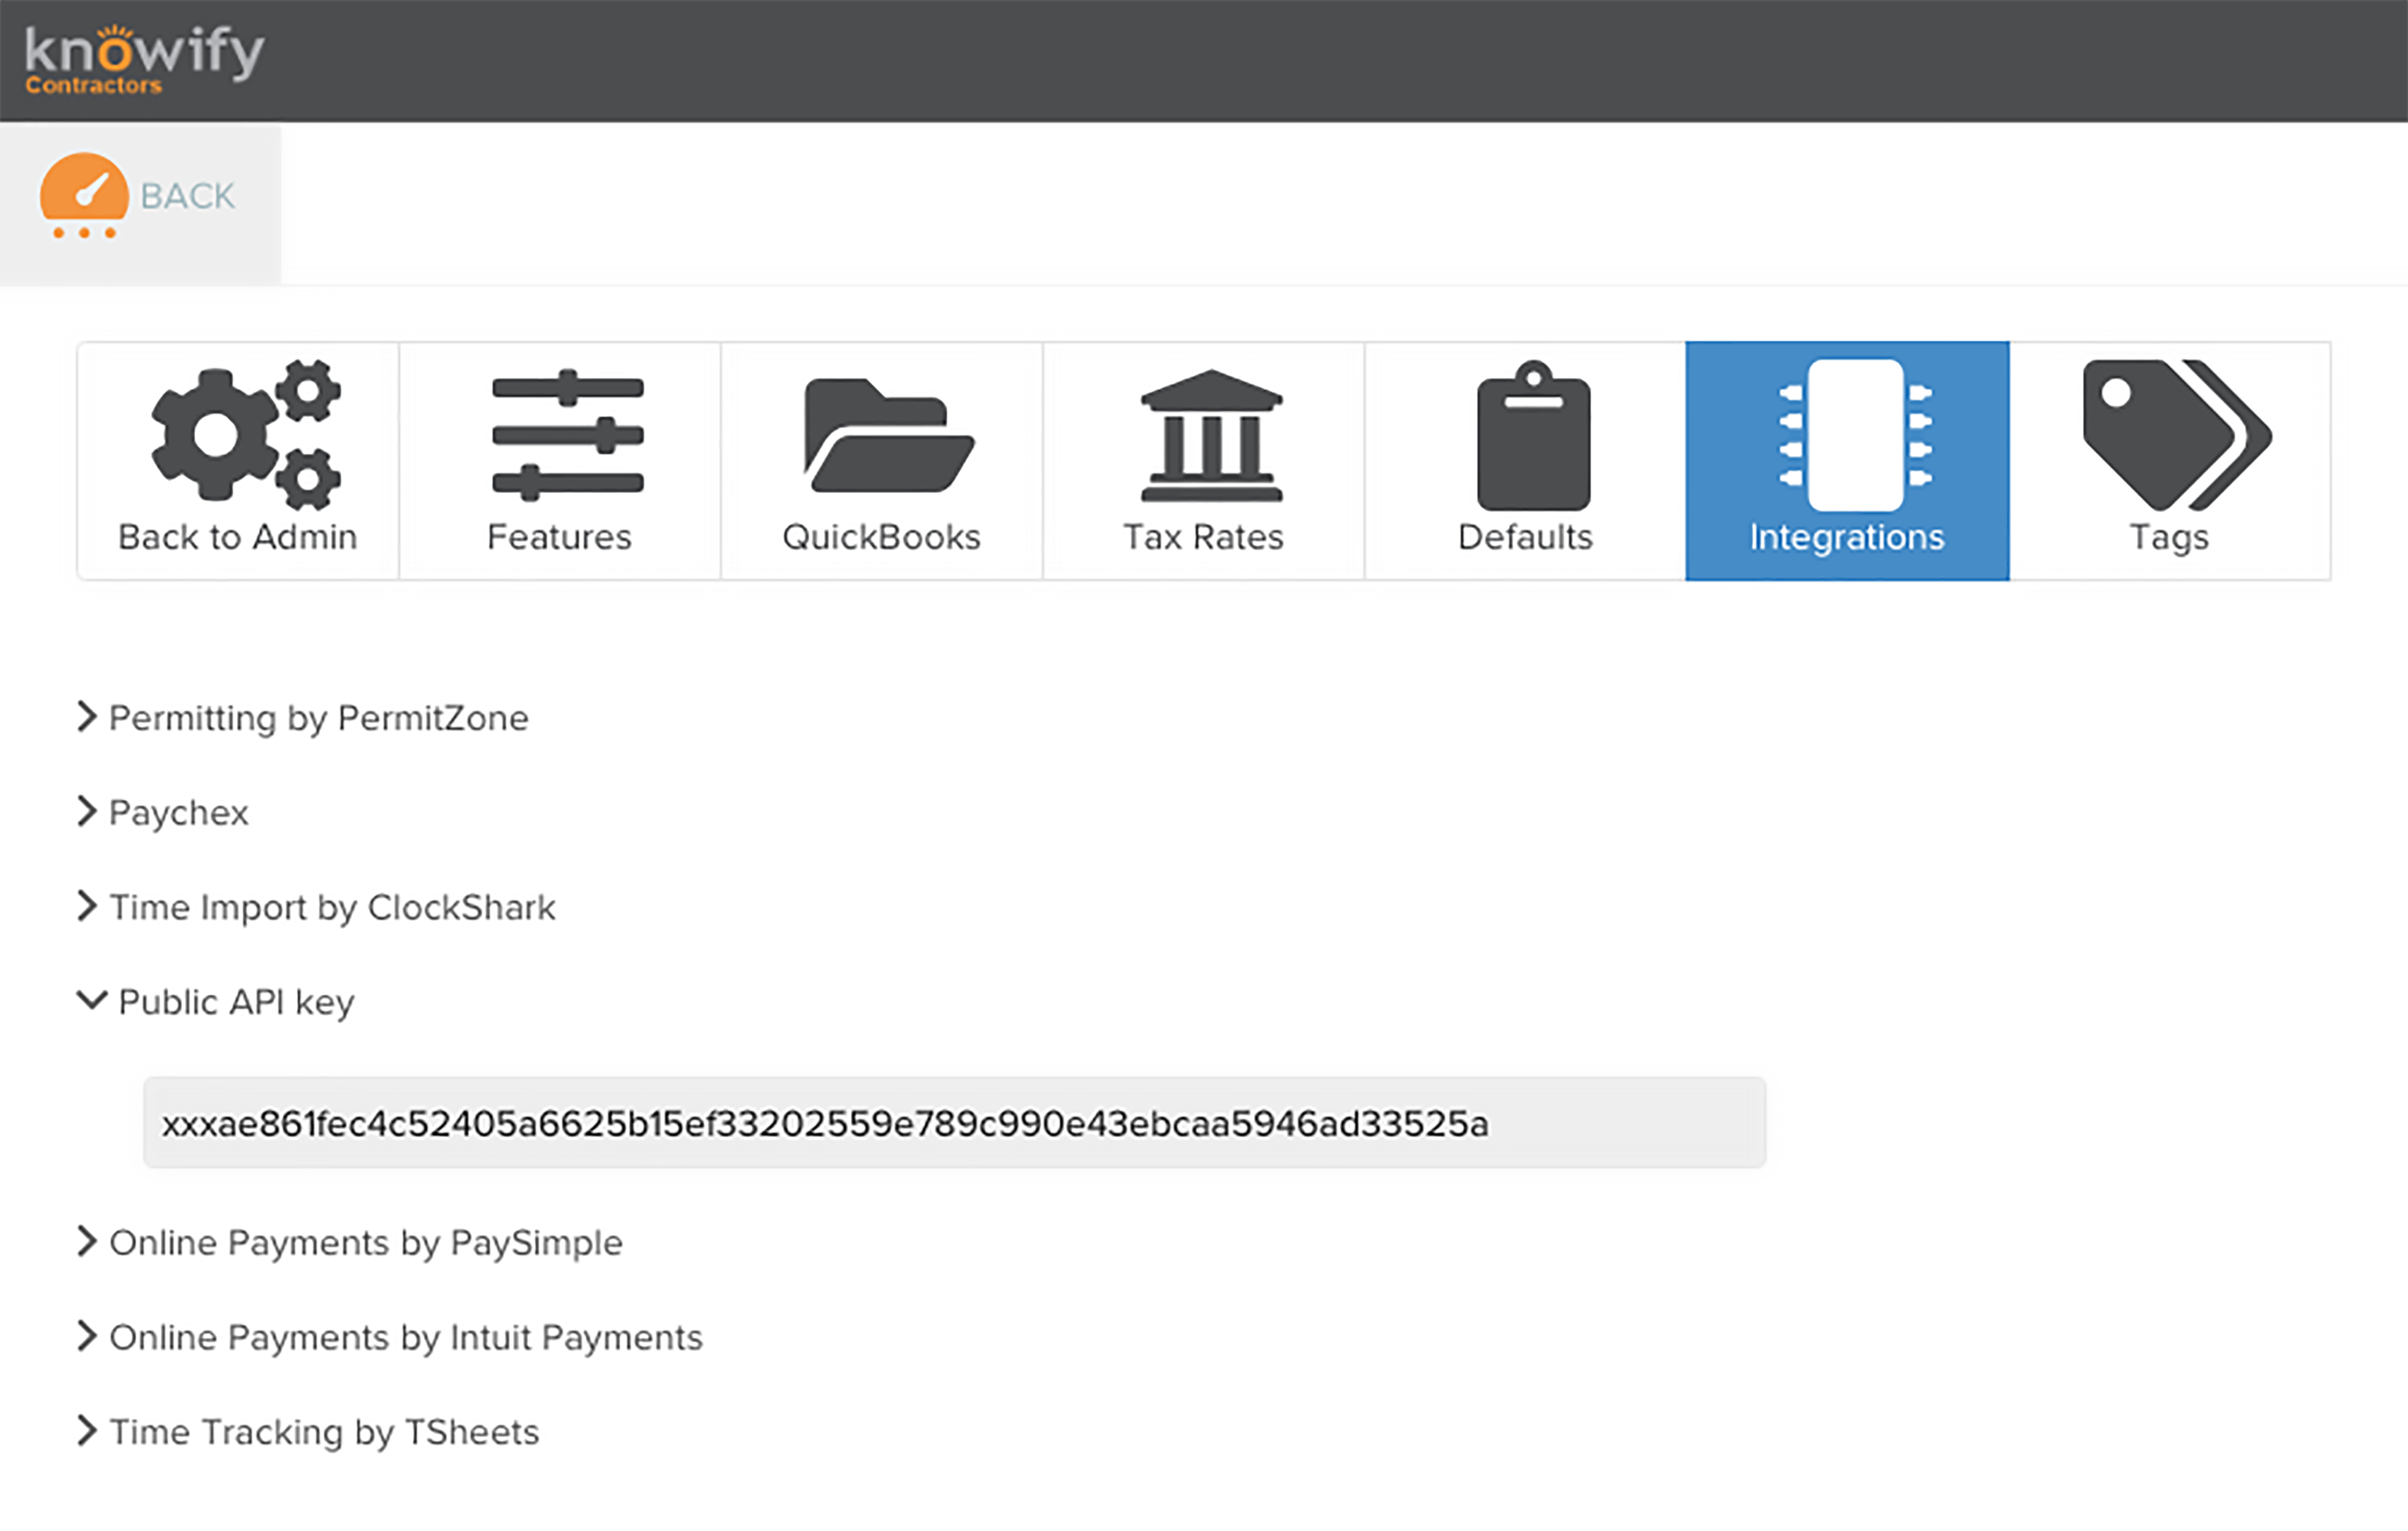
4. Choose "Integrations".
5. Click "API Key".
6. Click "Generate API Key".
7. Copy the API key to your clipboard.
Getting started with Zapier
Sign up for a free Zapier account, from there you can jump right in. To help you hit the ground running, click here to see some popular pre-made Zaps.
How do I connect Knowify to Zapier?
- Log in to your Zapier account or create a new account.
- Navigate to "Connected Accounts" from the top menu bar.
- Now click on "Connect new account" and search for "Knowify"
- Use your credentials to connect your Knowify account to Zapier. You'll find additional details on how to connect here.
- Once that's done you can start creating an automation! Use a pre-made Zap or create your own with the Zap Editor. Creating a Zap requires no coding knowledge and you'll be walked step-by-step through the setup.
- Need inspiration? See everything that's possible with Knowify and Zapier.
Comments
0 comments
Article is closed for comments.