
Knowify’s Deposits feature allows users to automatically generate a deposit invoice upon signing a contract. This can be enabled in your admin section, under the customize tab along with the ability to set your default preferences for deposit invoices:
To create a deposit invoice, you can start in your Create Contract screen. Shown below is a $15,000 Owner Contract, and a deposit of $1,000 is input into the deposit field:
When this contract is made active or signed by the client, it will automatically generate an outstanding invoice for the total amount of the deposit against the project. You can view this in the activity feed, as shown below:
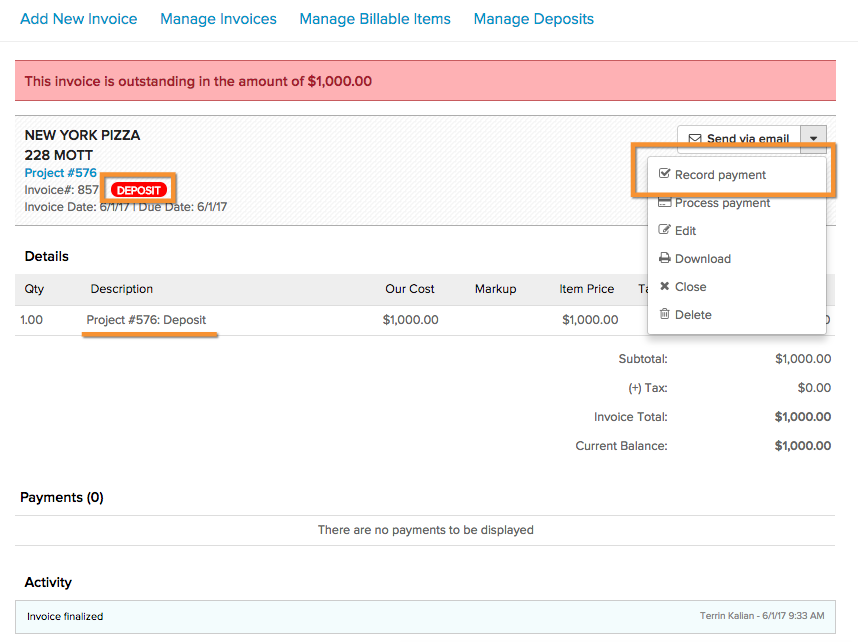
When you open the invoice, you will see that it’s marked as a deposit, and it is currently outstanding. To record that the client has paid the deposit, you can mark it in the dropdown menu as shown below. (If you’re synced with QuickBooks, this will have generated an invoice in QuickBooks as well, and the payment would pull over to Knowify if entered into your QuickBooks account):
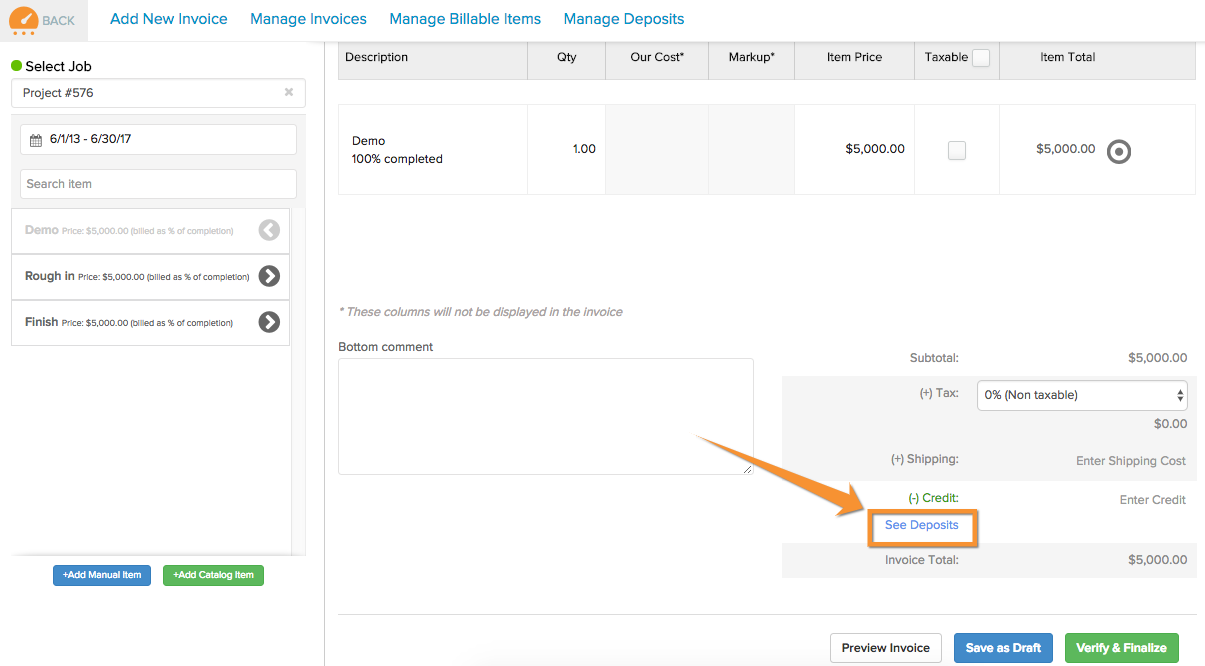
Once payment is recorded, it is officially logged as a deposit against the job, and you’ll be able to view how much was paid as a deposit next time you invoice:
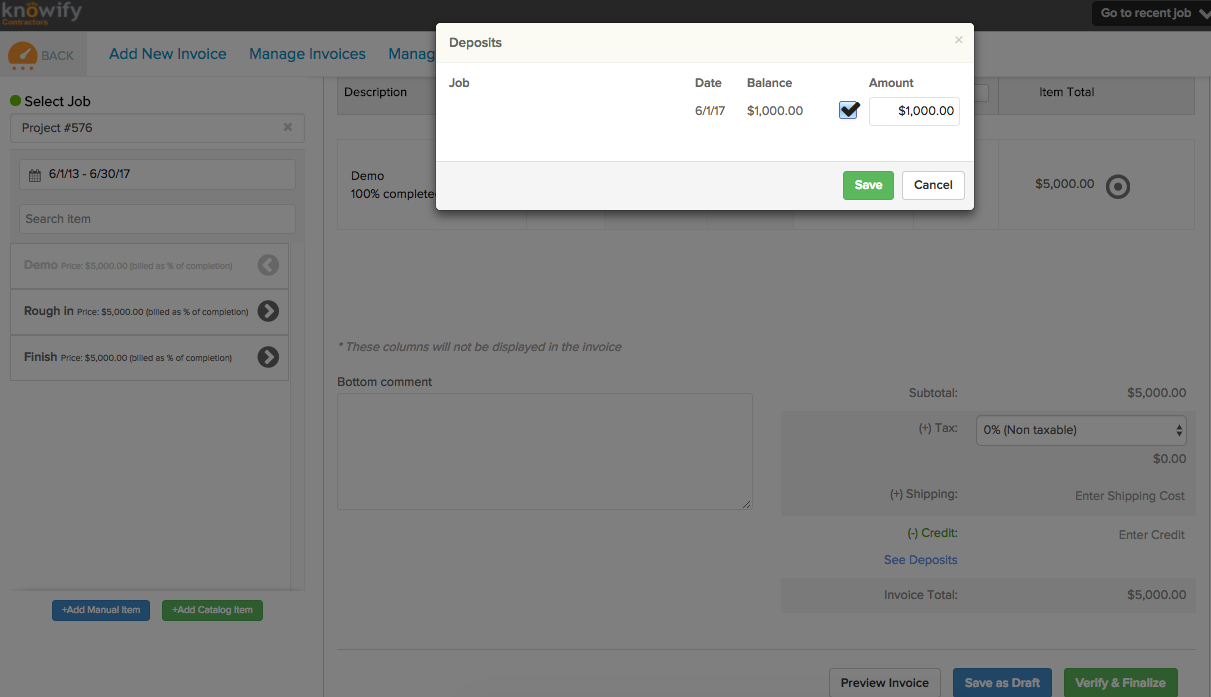
And clicking save, will add it as a credit against this invoice:
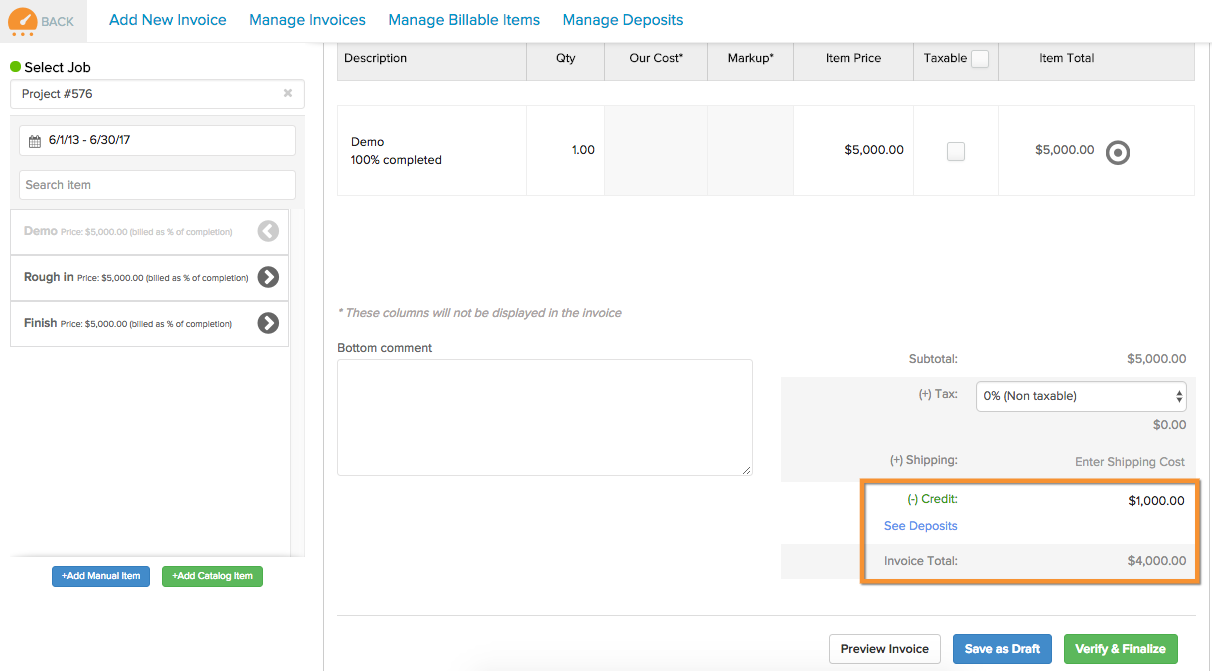
Which will then automatically settle the deposit amount with the client, so you can bill freely moving forward! If you have more questions about this contact support@knowify.com and our team is happy to help out!
If you are syncing with QuickBooks Online, you can define a default service to use for deposit invoices in your job defaults tab of the accountant's section here.
Comments
0 comments
Article is closed for comments.